First, a little terminology. "Transverse" means at right angles
to the centerline. "Longitudinal" means running fore-and-aft.
"Sole" means the surface in the boat on which you walk. A "floor"
is a framing member which joins the frames to the keel. The "keel"
is the structural member running fore-and-aft to which the bottoms of
the frames and floors are attached. A "skeg" is an external
attachment to affect the flow of water, which is not an integral structural
member of the hull. The "topsides" are the part of the hull
between the deck and the water. "Epoxy" refers to WEST SYSTEM®
epoxy resins and glues. Sorry to be so technical, but it makes it easier
to talk if everyone speaks the same language.
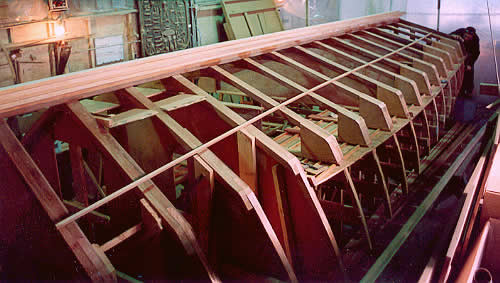
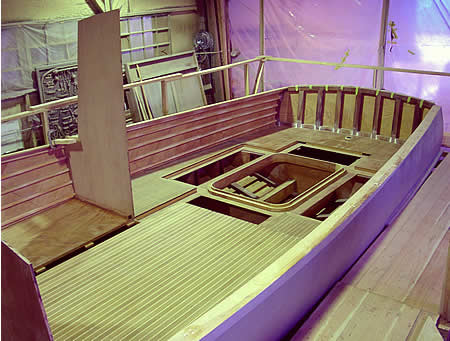
This boat, like our other V-bottom hulls, was built using a stringer/frame
system. In this system, transverse frames are erected, in this case on
20" centers. Over the frames go longitudinal stringers. The cold-molded
planking goes over the stringers. In the photo, the frames are set up
and faired, ready for the stringers. The cockpit sole, forecabin sole,
and dinette sole have already been teaked and are included in the setup.
The cockpit sole is supported by stringers in much the same way as the
hull planking. The "frames" between the cockpit sole and the
building floor are actually temporary molds, not part of the finished
boat. There is a stack of bottom stringers sitting on top of the keel.
The keel is, therefore, not as large as it appears. Other stringers are
seen lying beside the hull. The frames are African mahogany, and the stringers
are clear vertical grain Douglas fir. The frames and everything else below
the cockpit sole has been coated with epoxy. The slight greenish cast
is from the sodium vapor lights in the bay.
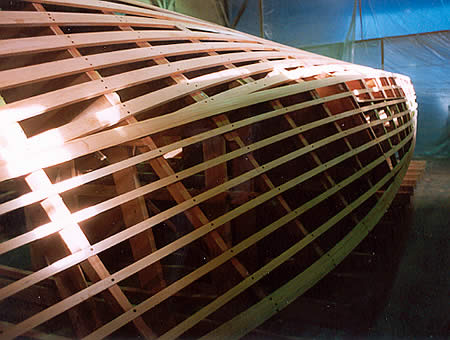
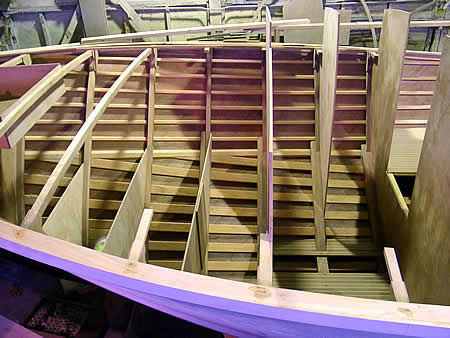
The chine and all stringers have now been installed. All these members
were precoated with epoxy resin before they were installed. The stringers
have been glued and screwed to the outside of the frames. The stringers
are not notched into the frames. This prevents "hard spots"
in the planking. It's stronger this way. The aft cabin bulkhead and engine
room bulkhead have to be watertight, so we have blocked between the stringers
just on those bulkheads. We also blocked between the stringers of the
head bulkheads, in this case to prevent ventilation.
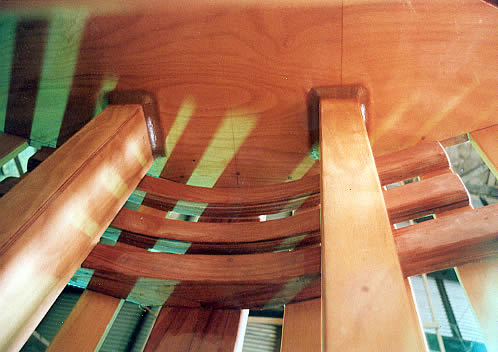
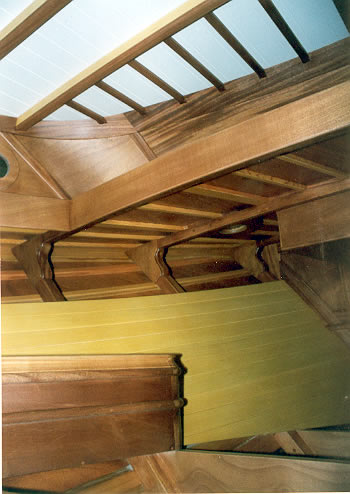
The boat was still upside down when we took this photo, but we turned
the photo over to make it more intelligible. This photo is taken inside
the engine compartment. The frame closest to us is a full frame. We see
the bottom sections of this frame attached to the top of the keel, and
joined by a laminated floor timber. Beyond it are two more laminated floor
timbers. The airfoil skeg will be bolted to these laminated floors. On
top of the frames and floors we see the engine bearers. All these materials
have been given the standard three coats of epoxy. Before we installed
the machinery, we Awlgripped this engine compartment, and sprayed polyurethane
varnish in the rest of the bilge. That will make it easy to keep the bilge
clean. Besides, it looks nice.
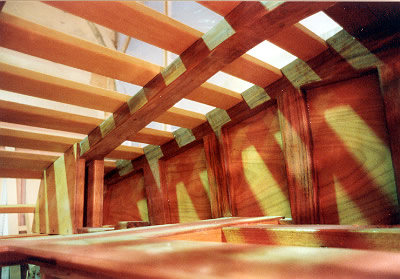
Here we are looking at the inside of the transom, portside, with the bottom
stringers passing over the aftmost frame and notching into the transom
frame. We also see the underside of the cockpit sole and the heavy plank
which will support the upper rudderpost bearing..
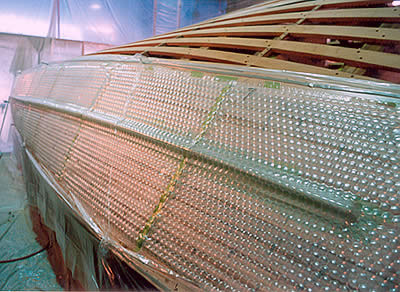
We usually plank the topsides first. On this boat, we planked the topsides
with one layer of 5mm African mahogany plywood, applied in diagonal strips.
We then faired and glassed this layer. That made it airtight. Then we
vacuum bagged a second layer of 5mm plywood, diagonally in the opposite
direction. Finally, we vacuum bagged a layer of 1/8" mahogany veneer,
running fore-and-aft. We are vacuum bagging that final layer in this photo.
The veneer is mostly to keep the plywood seams from printing through the
high gloss Awlgrip paint job. The hull will be sheathed in epoxy and fiberglass
and then painted.
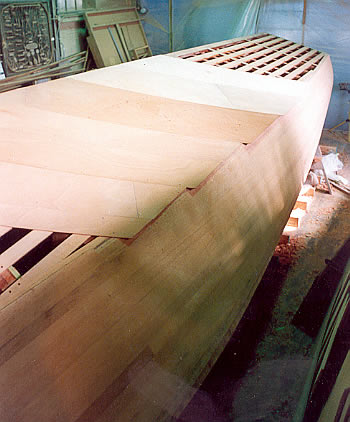
The topsides are planked and faired. Here we are beginning to fit the
first layer of 6mm African mahogany bottom planking. This is applied in
diagonal strips like the topsides. Since the shape of the boat is so easy
from amidships aft, we are able to use very wide strips in that area.
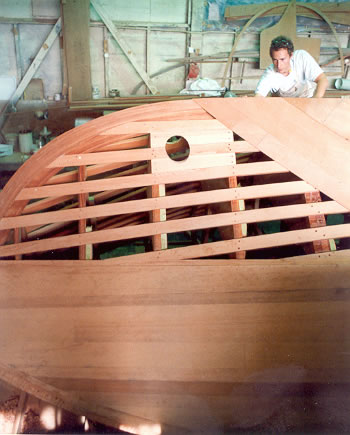
Here we are heading for the bow, fitting that first layer of bottom planking.
The stem is laminated African mahogany. The blocking with the hole in
it is for the bow thruster. The rest of the bottom planking process will
be similar to the topsides planking, but without the layer of veneer laid
fore-and-aft.
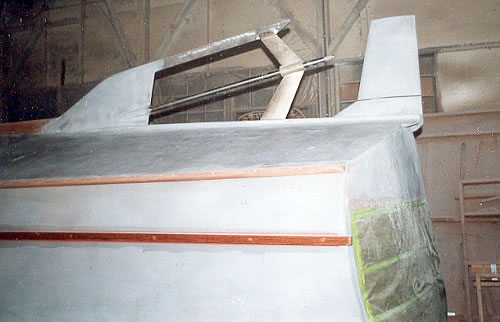
The hull exterior is finished and we are getting ready to apply the undercoat
and antifouling paint. The hull has been glassed and epoxied with two
layers of glass cloth. The gray color is from the pigment in the epoxy
coating. The gray skeg and rudder are composite airfoils made from stainless
steel, plywood, epoxy, and fiberglass. The strut is cast silicon bronze.
Forward of the airfoil skeg is a long, shallow wood skeg. We added the
long wood skeg to the design after model testing, to improve steering
at low speeds. We extended the rudder past the end of the hull proper
so that we could move the steering gear and the prop and its noise further
aft. That also gave us a shallower shaft angle. This skeg, shaft, and
strut arrangement protects the prop from debris and still gives a clean
flow of water to the prop. Note that the spray rails, skeg, and rudder
assembly are installed on the outside of the hull surface, over the top
of the glass and epoxy which forms the hull exterior. This improves the
integrity and longevity of the hull.
When we rolled the hull over and removed the molds in the cockpit and
pilothouse areas, the boat looked like this. In this photo, we are fitting
the starboard half of the pilothouse bulkhead. We couldn't include this
bulkhead in the setup because it was too tall.
We are looking down into the forecabin and head area just after rollover.
We see the teak forecabin and head sole. The box on the left, suspended
from the deck beams, is the anchor locker. It will have access through
a hatch in the foredeck.
The forecabin woodwork is done and has been given many coats of satin
varnish. The cabin top has been installed. In the left foreground is a
low cabinet beside the berth for small item storage. The yellow planking
behind it is the yellow cedar berth ceiling. A "grapefruit squeezer"
deck prism will be fitted in the hole visible in the deck beside the anchor
locker box.

