

|
|
|
||||||||||||||||||||||||||||||||||||||
|
| |||||||||||||||||||||||||||||||||||||||
|
||||
Building a custom wood powerboat
|
||||
Photos of the 22' Eastsider under construction, before planking began |
||||
We launched this small powerboat in May of 2008. I'm writing this in January of 2009, so my first task is to try to remember in what order we did all this. In reality, we're not that scattered. I wrote a whole book documenting the construction, like I do for every boat. I think this is the first thing we have a good photo of: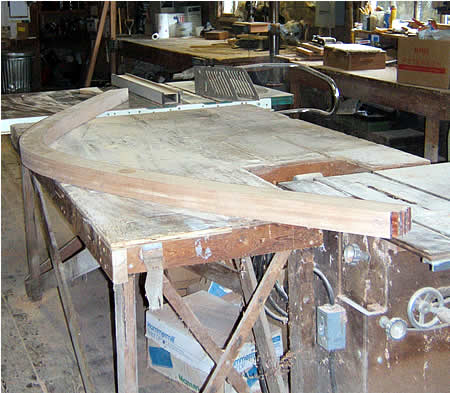 The stem is a lamination of 11 layers of 5/16" Khaya (African mahogany). We laminated it on a form on the floor and then cleaned it up 'til it looked like you see it here. Then we marked all the frame lines, plank bearding line, etc. on it and it was ready to set up. In the foreground, under the end of the stem, you see the 38 year old table saw that I built when I was starting my first boat shop. It's now a router table. Next we glued up the transom frame on a jig we keep especially for this purpose. That center section is Khaya and the rest vertical grain (V.G.) Douglas fir. Note that the grain of the Khaya runs vertically to resist the bending moment from the outboard. 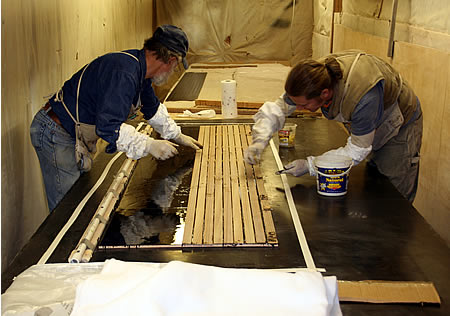 The cockpit sole in most of our V-bottom boats is made from thin teak planks vacuum bagged onto epoxy coated plywood. We use epoxy with graphite added to it so it's black like traditional caulking. Unlike traditional caulking, it requires no maintenance and lasts close enough to forever for practical purposes. Here we are positioning the planks over a thick coat of wet epoxy. 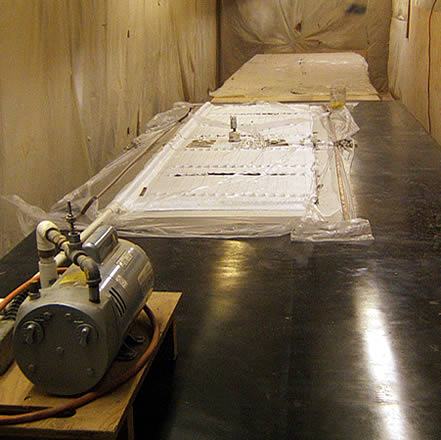 Here's half of the cockpit sole under the bag, vacuum pump in the foreground. Vacuum gauge sits on top. The regular bumps in the bag are the spacers between the planks. The principle of a vacuum bag is that since the pressure in the bag is low, atmospheric pressure pushes on both sides of the bagged object. You could do the same thing with a lot of weights, but at 10 lbs. per square inch, that'd be a lot of weight and a pretty strong table to support it. 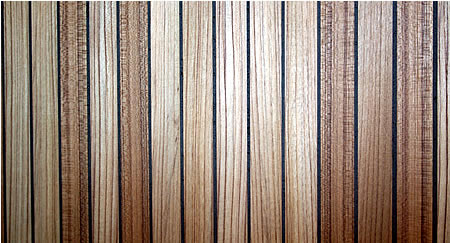 This is what the finished product looks like. 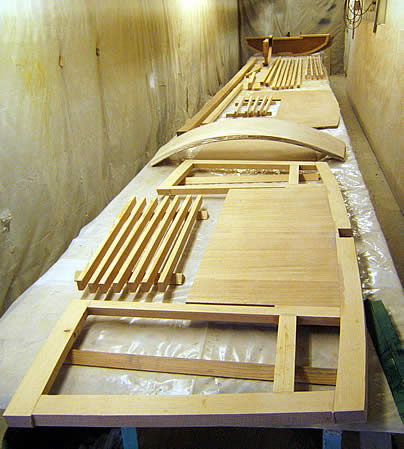 Next this insulated work area is taken over by parts which will be epoxy coated here. Not visible in these photos is a row of high-wattage infrared lamps which we use to preheat materials just before coating them with epoxy. Here's the finished transom frame, all epoxy coated, with a notch for the keel and cleats to receive the cockpit sole. It has its jigging legs attached to position it at the correct height over the ladder frame. See how relatively flat the bottom is in the stern. That enables the boat to run very nicely at moderate speeds with little power. In the background, you can see the web frames that go below the cockpit sole. 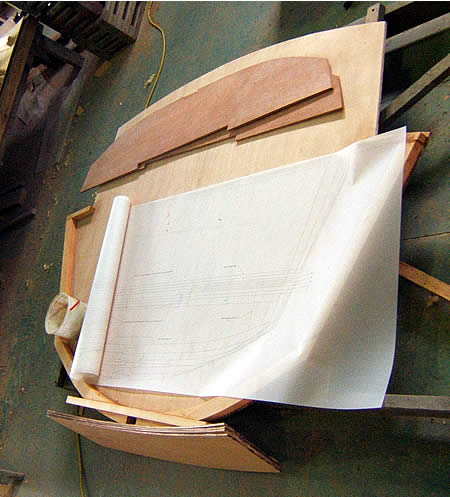 The major object in this photo is the cabin bulkhead with frame attached. The full-size computer printed Mylar of the aft frames is unrolled on it. That's how we get the shapes of all these frames and bulkheads. A couple of web frame bulkheads lay on the cabin bulkhead. The plywood for the curved cabin front, which is about to be vacuum bagged into its shape, was placed near the bottom for this photo.  OK, we've made our parts, now to set them up on the ladder frame. Each frame is held in position by "jigging legs." Aft of the cabin bulkhead stand the molds, which form the topsides in the cockpit area and are removed after we roll the boat over. 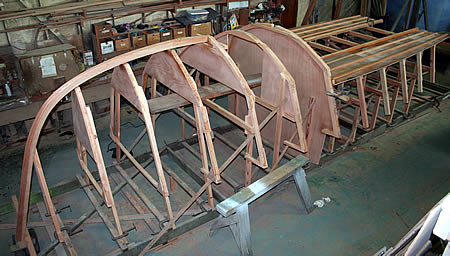 Then we set the stem in place and lay the cockpit sole halves on top of the molds. The stringers which will stiffen the cockpit sole are glued in place. 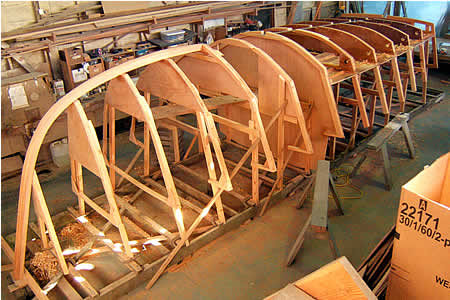 The epoxy-coated web frames now stand on the cockpit sole stringers and the transom frame has been attached to the cockpit sole. 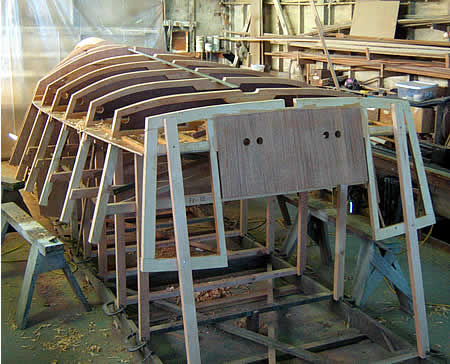 Here we see it from the stern. Note how the keel notches in all these disparate parts, which have never met before, nevertheless line up. We loft our boats on the computer, but it works equally well to do it on your hands and knees. 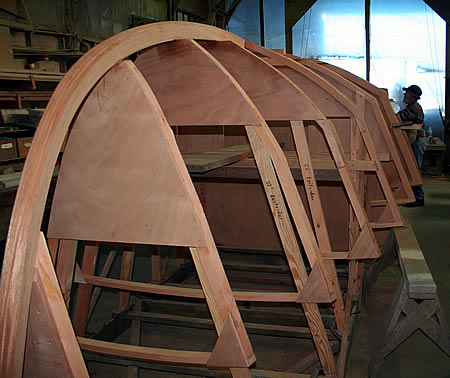 And here we see it from the bow. 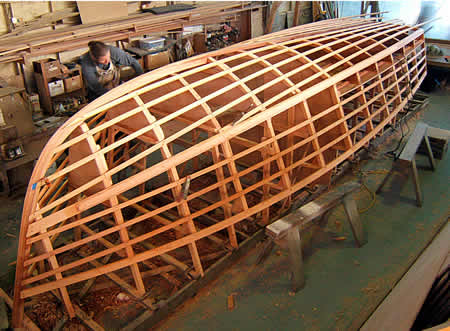 We didn't get to see the stringers, chines, and keel being made and coated, but zingo! here they are. Some are glued on and others still being fitted. Now we can see the shape, and a pretty shapely shape it is. Lots of "V" in the bow transitioning to a much flatter bottom at the transom. The curved frames are necessary because we will plank this hull with sheet plywood and the plywood needs these curved sections to wrap around. OK, that's it for this page. On to page 2 of the construction photos. |
We are located on the Snohomish River in the Pacific Northwest, about 20 miles north of Seattle.
Click here for a map to Nexus Marine Corporation.
| Home | The Boats | Boat Plans | About Nexus | Why Wood | FAQ | Links |
| 22' Eastsider Home Construction, pg. 2 |